Who is submitting contact forms on your website? Where are these potential leads coming from? Tracking conversions, like form submissions, is the first step to understanding how your marketing campaigns are performing. In this tutorial, we’re going to show you step by step how to set up tracking of contact form submissions on your website using Google Tag Manager and Google Analytics. This tutorial assumes you have already set up Google Tag Manager and Google Analytics, and installed the code on your site. If you haven’t, you’ll want to start with these tutorials first:
How to Set Up Google Analytics
How to Set Up Google Tag Manager
Configuring Google Tag Manager to Track Form Submissions
Set Up Google Tag Manager Variables
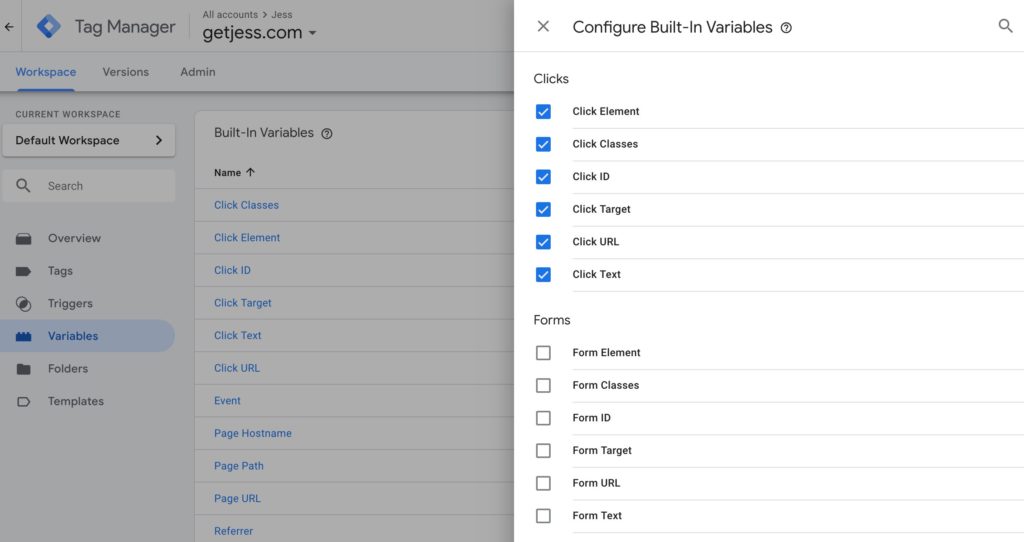
Before you can start tracking that a contact form was submitted, you need to make sure some variables are enabled to capture this data. Click Variables, then Configure. We’ll be looking to track clicks, so make sure the 6 variables under Clicks are checked. Keep in mind if you have set up other tags and triggers to track other click-based conversions in Tag Manager, these may already be checked.
Now, let’s create a tag to capture your contact form click.
Create a Google Tag Manager Tag to Capture Contact Form Submissions
Next, we are going to set up a tag that will tell Google Analytics to create an event with certain parameters when someone clicks your contact form submit button, and a trigger to alert the tag when someone has actually clicked the submit button. Remember when we enabled the variables earlier? We will use one of them to identify that the submit button of a particular form was clicked specifically.
Now, let’s create a new tag:
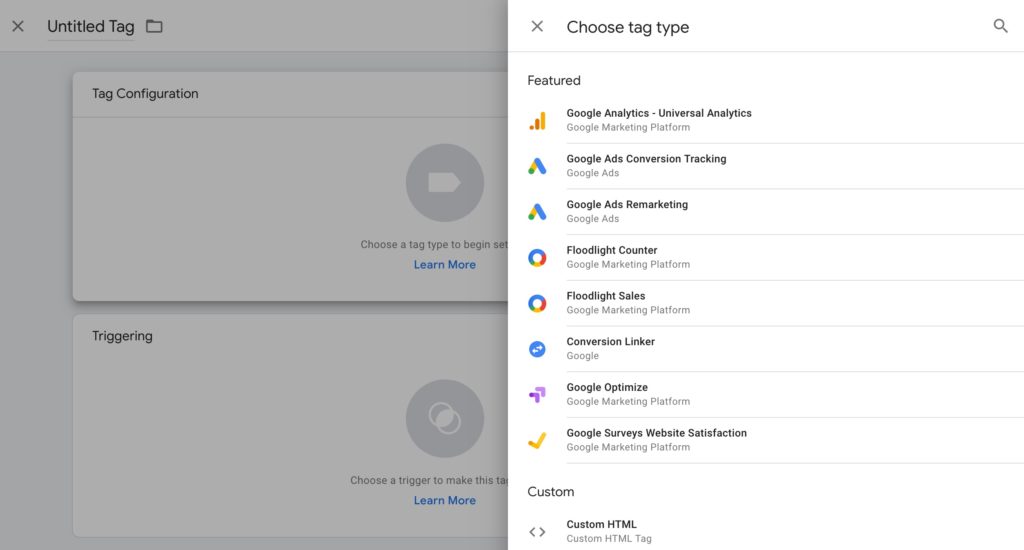
Click Add a New Tag
Click the Tag Configuration box and select the type of tag you would like to use. Since we would like to set up Google Analytics Event tracking, we will choose Google Analytics – Universal Analytics.
Under Track Type choose Event.
Now enter the tracking parameters you would like to assign. You can use any name you want, but for this example, we will use Form as the Category and Click as the Action. Since you want to track when someone clicks the contact from submission button, this name will be easy to recall when you set up the Goal in Google Analytics, which will cover next.
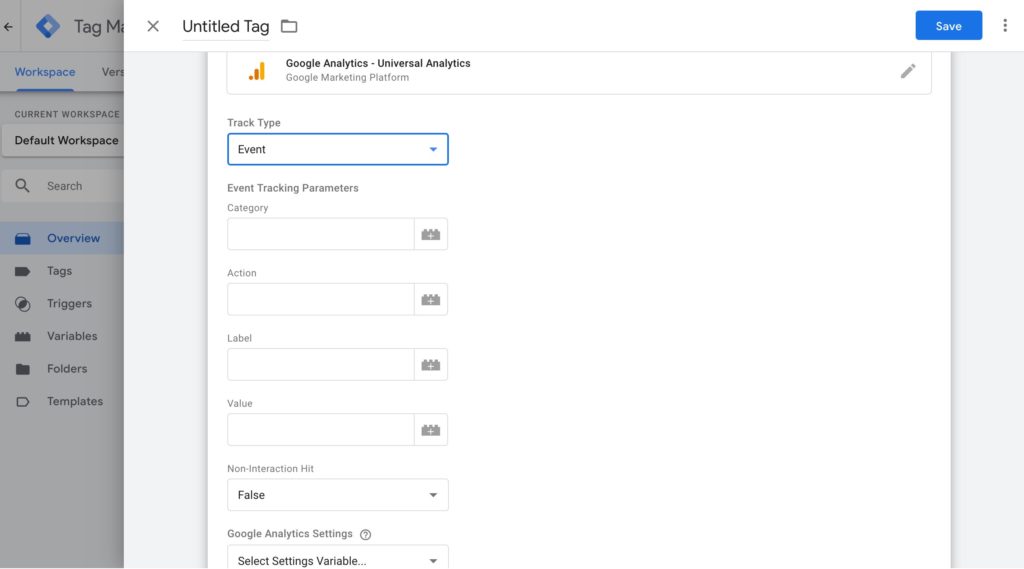
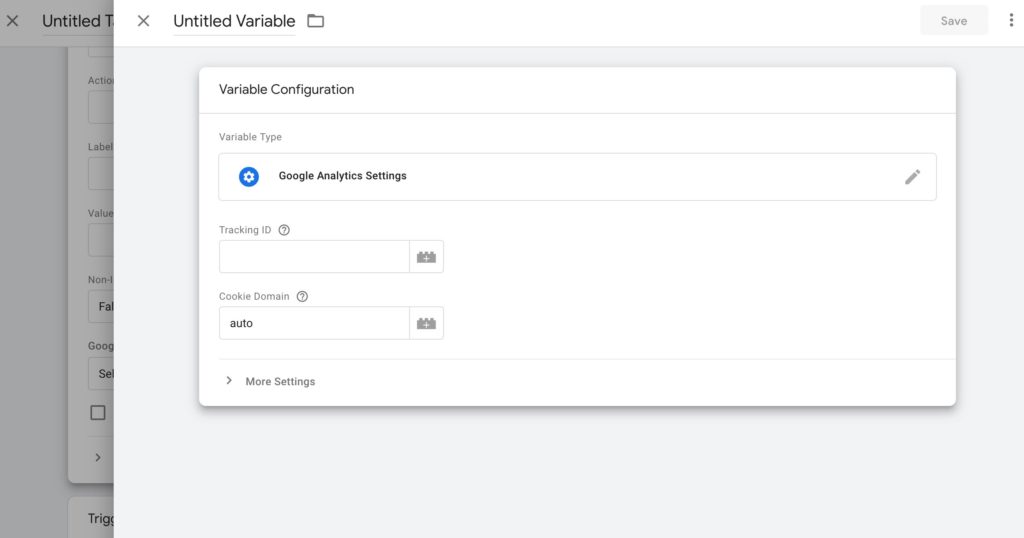
Under Google Analytics Settings, click New Variable and input your Google Analytics ID so Google Tag Manager knows where to report the event. If you don’t know your ID or how to log into Google Analytics and find it, follow these instructions.
Click Save.
Create a Trigger
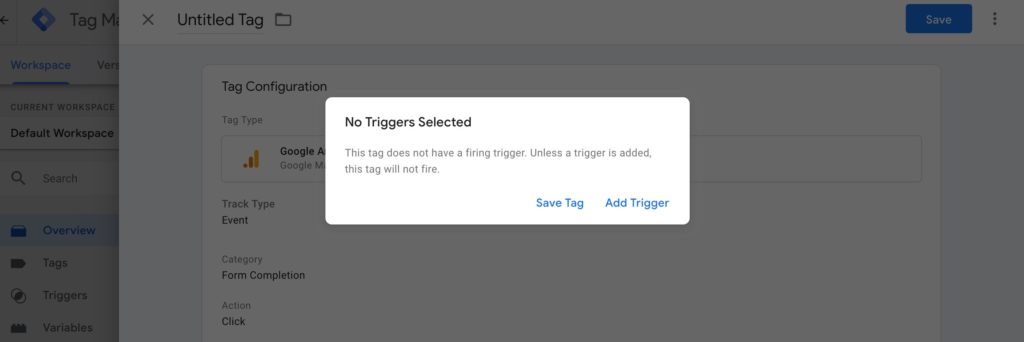
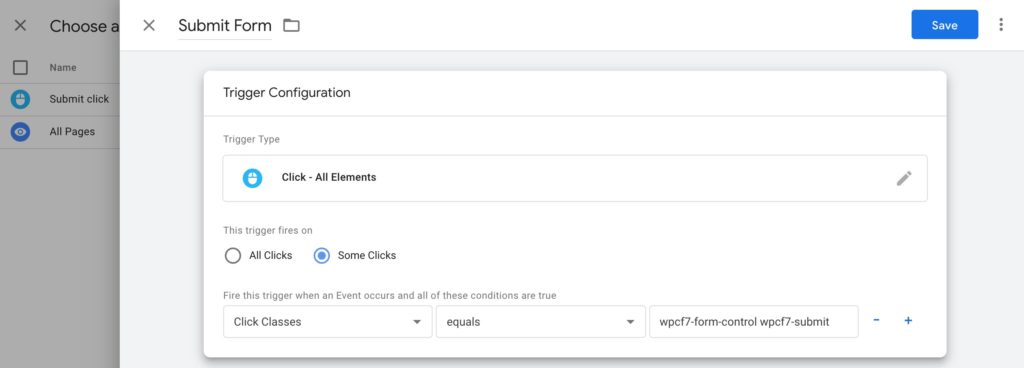
Now you need to add a Trigger which tells the Tag when to run. In this case, we only want to tag to execute when someone clicks the contact from submission button. Click Add Trigger to continue.
Click the + sign and then click the Trigger Configuration box.
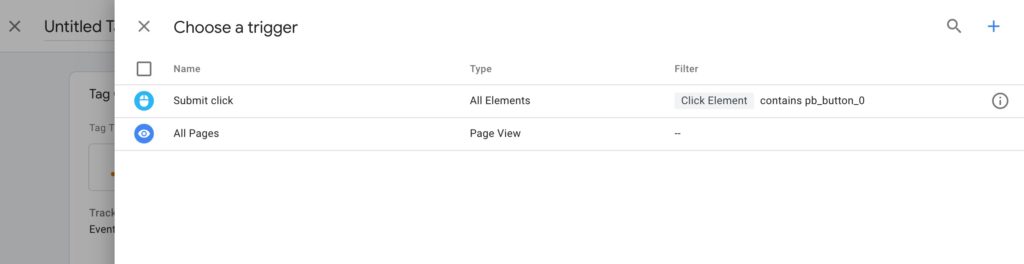
Since we are tracking a click chose Click – All Elements
Since we are only looking to track the click of a specific button, in this case, contact form submission button, choose Some Clicks.
Now, you’ll need to choose and configure variable that you can use to uniquely identify the click. This is the trickiest part for beginners. Right click the submit button you want to track and click Inspect and then click Edit, Copy and paste it into a document so you can look at it. This is the code from the Jess contact from submission button.
<input type=”submit” value=”Send” class=”wpcf7-form-control wpcf7-submit” id=”form-submit”>
You will want to find text between the quotation marks after either class= or id=. The text in between the quote marks is the variable you will need.
In my example, my button has a class that identifies it uniquely, wpcf7-form-control wpcf7-submit. In some cases, you will need to use ID, which in this example is form-submit. Choose Equals and copy in the class name exactly or choose Contains and copy in just a portion of it.
Next, click Save and name your trigger. In this case, I called it Submit Form.
Name your Tag and click Save.
Finally, you’ll need to save and publish your container.
Click Submit, type in a few words that will describe what you created (or updated) and click Publish.
Test Your Tag
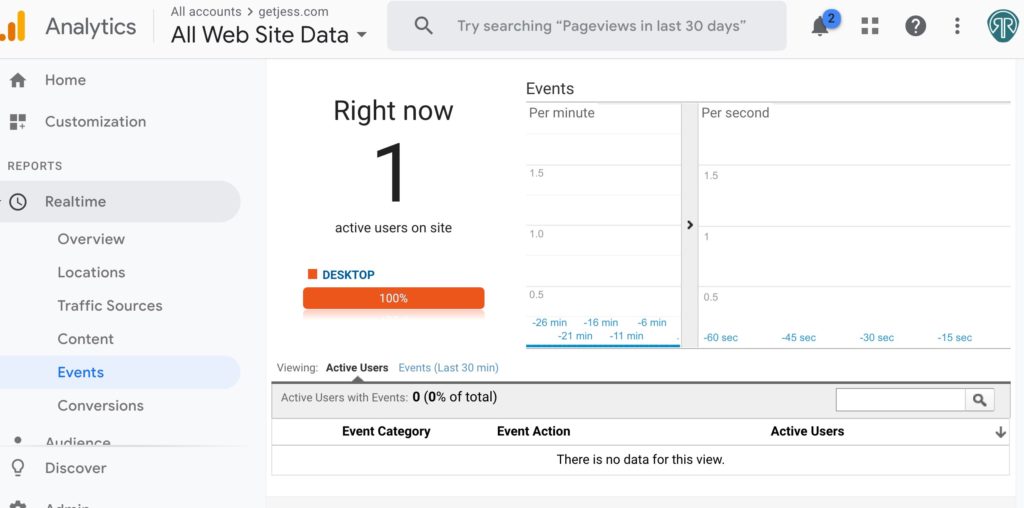
Now it’s time to test. Open Google Analytics. Open your website in another browser tab or window. Navigate to the contact form, fill it out, and submit it. Quickly go back to Google Analytics and click Realtime. If you used the Category and Action we suggested, you should see that the Event Category is Form and the Event Action is Click. If you see them, you are all ready to set up your event tracking goals. If you don’t see an event tracked at all, carefully retrace the steps above. In particular, make sure you have used the right logic in your variable and be sure to re-publish the container if you make any changes.
If everything looks OK, let’s set up the Event Goal.
Setting up Goals to Track Form Submissions in Google Analytics
What are Event Goals?
An Event Goal tracks when a user completes a particular action that meets one or more conditions defined in the Google Tag Manager tag.
Events are typically defined with one or more of the following attributes:
- Category
- Action
- Label
- Value
The Goal only triggers when each of the category, action, and label attributes is executed. In this example, we used Form as the category and Click as the Action, so we need to set up a Goal to register a conversion if Category = Form and Action = Click.
How to Set Up Event Goals to Track Form Submissions
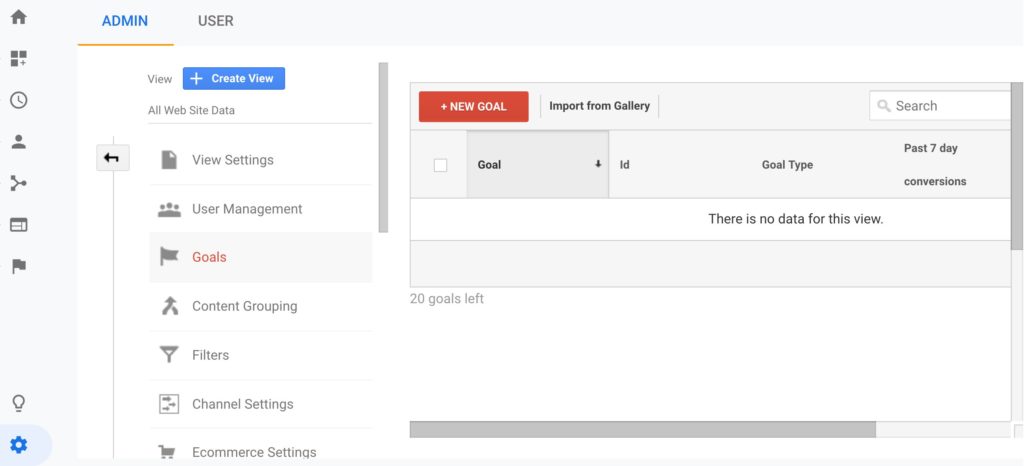
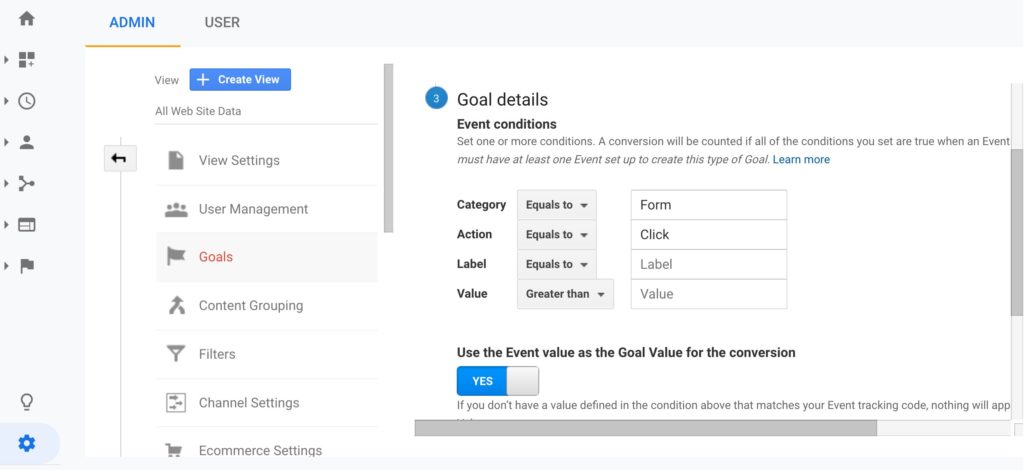
Click the Admin menu, which looks like a gear, Goals, + New Goal.
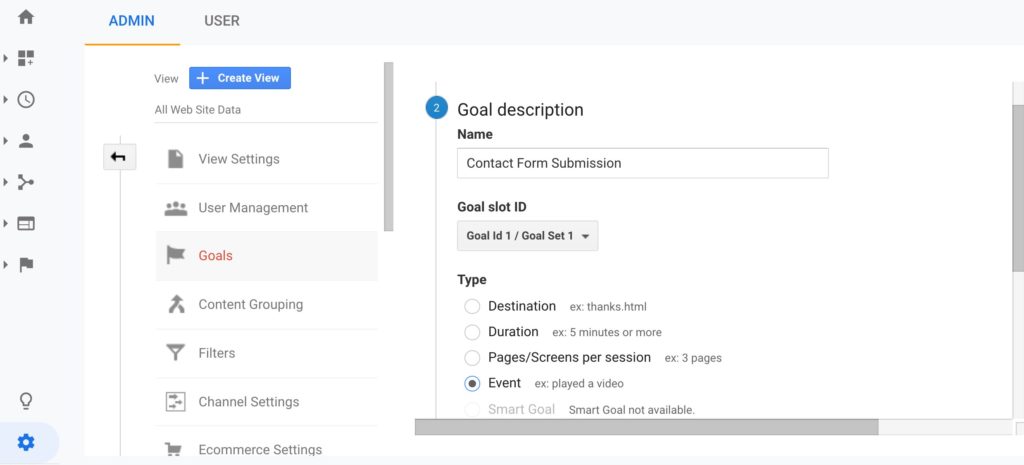
Under 1 Goal Setup, select Custom and then Continue.

Under 2 Goal Description, enter a Goal Name. (Note: Use something you’ll recognize, for example “Contact Form Submission”).
Select Event, and then Continue.
Under Goal Details, enter the Form as the Category. Enter Click as the Action.
Click Save
Testing Event Goals
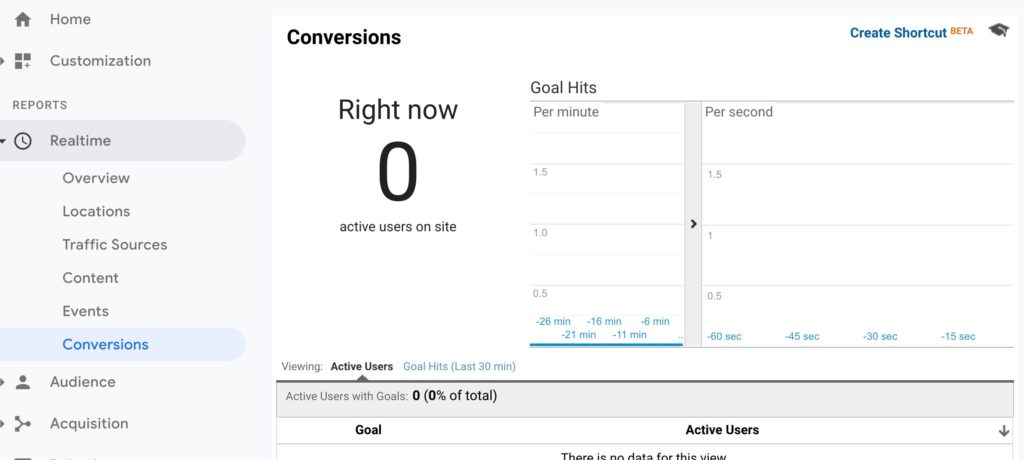
Now, test your Goal and make sure everything is set up correctly. From Google Analytics, click Real Time, then Conversions, then complete your form and click the Submit button. If everything was set up correctly, your goal should be recorded and you’ll know because there will be a 1 next to the goal in the Active Users column. If your Event Goal was incorrectly set up, go back into the admin and edit your goal, and confirm you followed the above seven steps exactly. If you aren’t sure you identified the proper category or action, select Real-Time and then Events and look to see what Event Category and Event Action were recorded. If you used the suggested category and action, Category should be Form and the Action should be Click. Keep in mind events are case sensitive and need to be defined precisely.
Now that you are tracking contact form submissions on your site, you can take your marketing analysis to the next level with Jess. Our marketing analytics dashboard will let you see at a glance which channels or campaigns are driving leads to the contact forms on your site. Start analyzing your campaign performance for free today! Then go even further with Jess form tracking software, which will let you qualify those leads to get a full understanding of the ROI for each of your marketing campaigns.
Stuck setting up conversion tracking for your form? Just post a comment below and our Jess marketing experts will help you out.
Don’t miss out on our next tutorial! Please subscribe to our marketing newsletter.

0 Comments