Installing Google Tag Manager
There are two ways to set up event tracking. You can hand code your event tracking, but unless you have in-house website developers or are particularly technical, this isn’t a particularly easy way to go. A more convenient way, and the subject of this tutorial, is to use Google Tag Manager. While you must first install Google Tag Manager on your site, once it’s there anyone on your team can add events or code blocks (e.g. tracking pixels) to the site.
If you aren’t currently using Google Tag Manager, you’ll need to go https://tagmanager.google.com to set up an account and install it using these steps:
Click Create Account

Enter your business name into the Account Name field and your web address into the Container Name field. Click Web as your target platform.
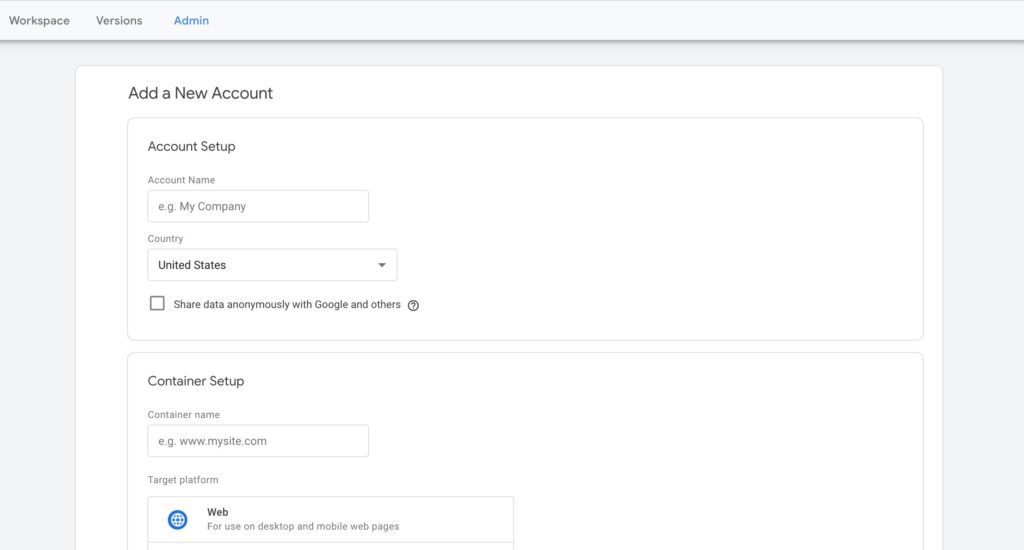
Click Create
Accept the Terms of Service
Next, you’ll need to install some code on your site in the <head> and <body> place of every page. You may need to enlist a web developer to help you out.
Set Up Google Tag Manager Variables
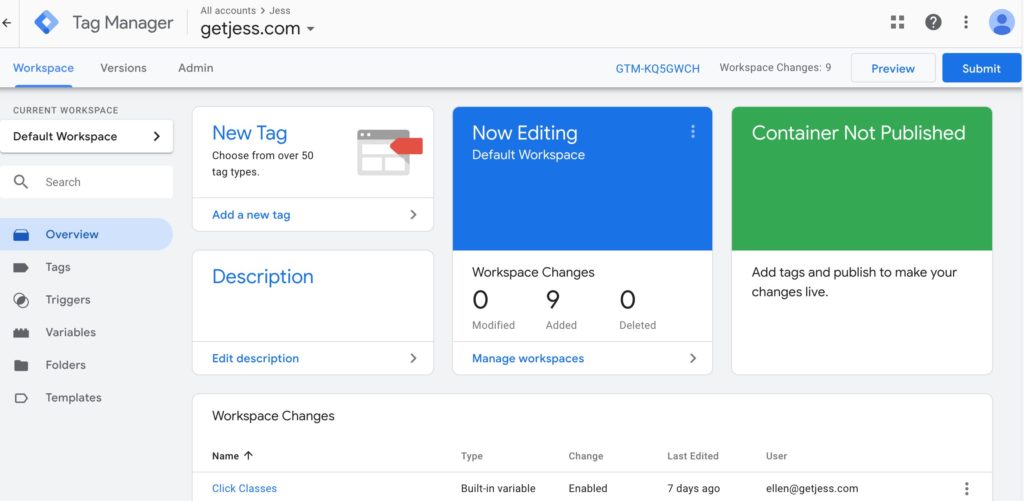
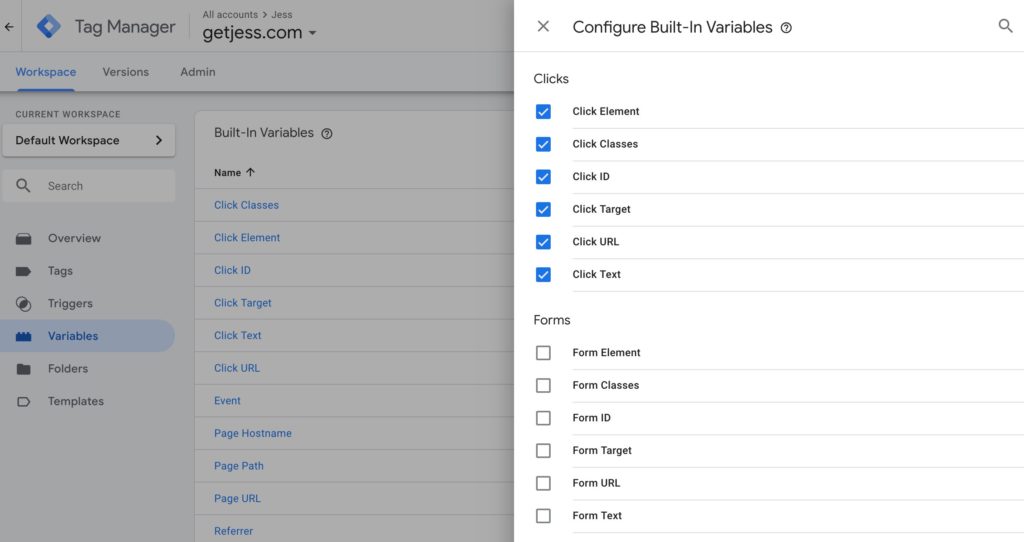
Once you have Google Tag Manager in place, it’s time to create your first tag. But first, you need to make sure some variables are enabled. Click Variables, then Configure. We’ll be looking to track clicks, so make sure the 6 variables under Clicks are checked.
Now, let’s create a tag.
Create Your First Google Tag Manager Tag
Tags are bits of code that are added to a site in order to collect information for use by a third party application. This code is run when a specific action you specify as a Trigger occurs. In this tutorial, we are going to set up a Tag to communicate with Google Analytics. The tag will tell Google Analytics what to do, and the trigger will tell the tag when to run.
As mentioned previously, you can use tags to track a wide range of actions, but in the steps that follow, we are going to set up a tag that triggers when the submit button of a form has been clicked. Remember when we enabled the variables earlier? We will use one of them to identify that the submit button of a particular form was clicked specifically.
Now, let’s review the steps to create a new tag:
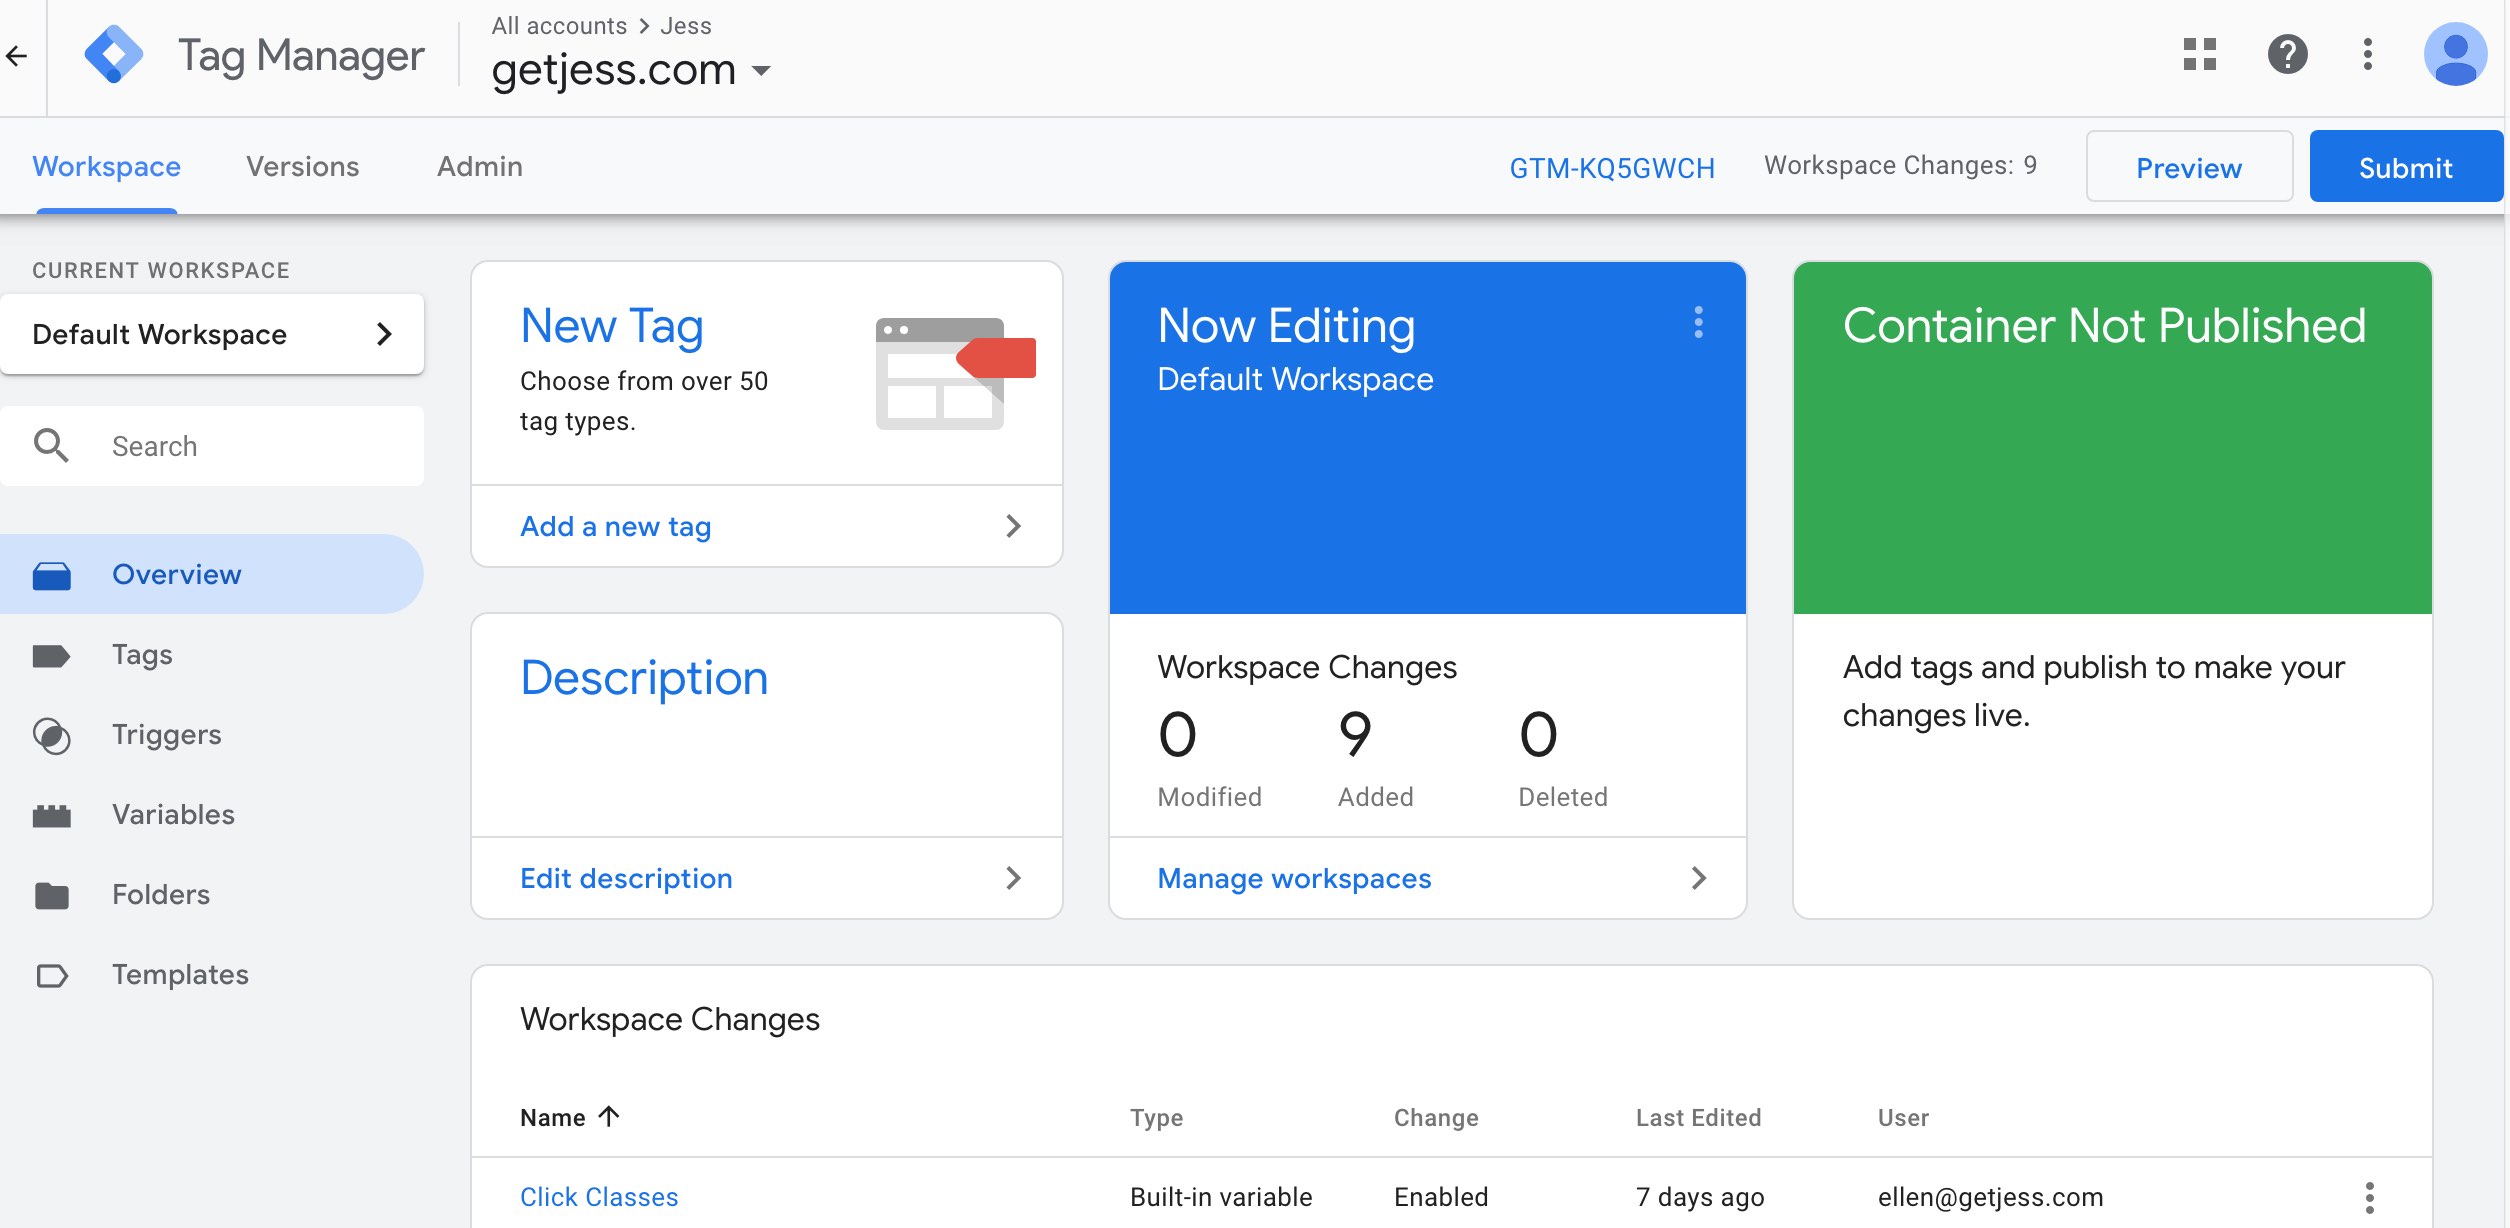
Click Add a New Tag

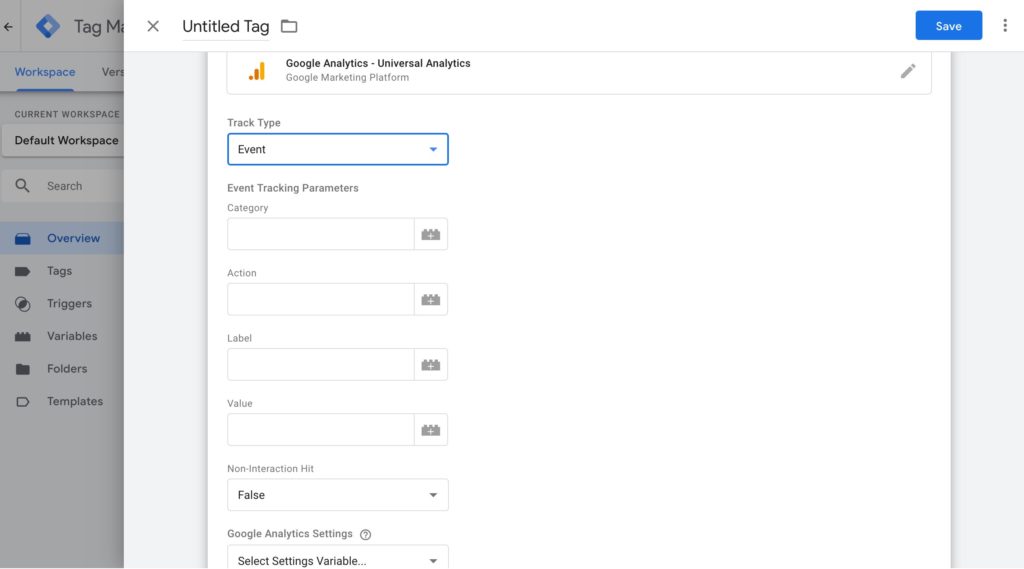
Click the Tag Configuration box and select the type of tag you would like to use. Since we would like to track Google Analytics Events, we will choose Google Analytics.
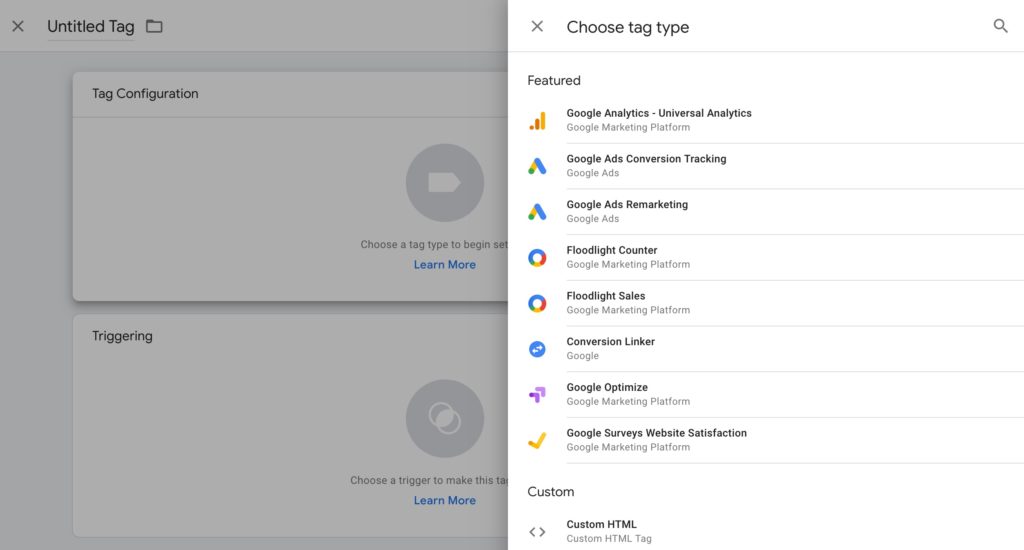
Under Track Type choose Event.
Now enter the names of the tracking parameters you would like to assign. For example, you might want to name something descriptive like Category Form Completion and the Action Click to track the click of a contact form submit button. You can use any name you want, but choose parameters you will remember. You will need to be able to recall what they are exactly when you set up the Goal in Google Analytics which will cover next.
Under Google Analytics Settings, click New Variable and input your Google Analytics ID so Google Tag Manager knows where to report the event. If you don’t know your ID or how to log into Google Analytics and find it, follow these instructions.
https://support.google.com/tagmanager/answer/9207621?authuser=3#ga_id
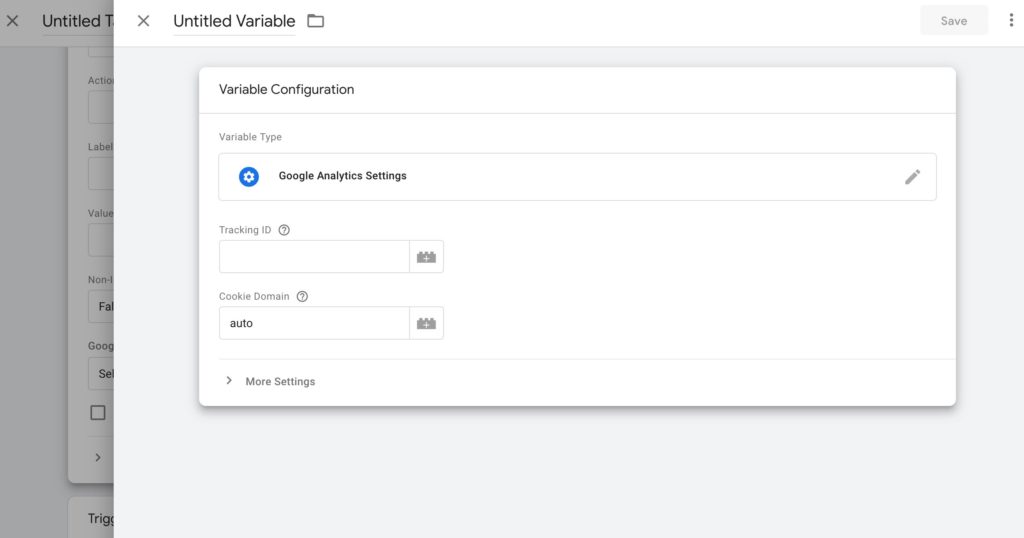
Click Save.
Create a Trigger
Now you need to add a Trigger so the Tag knows when to run, so click Add Trigger.
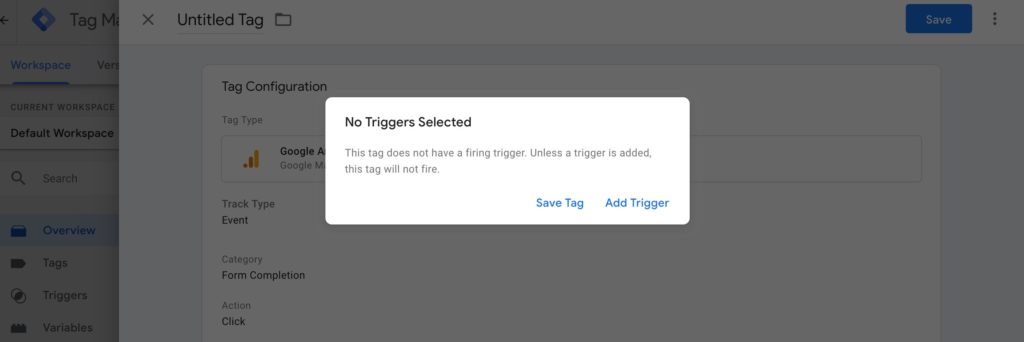
Click the + sign and then click the Trigger Configuration box.

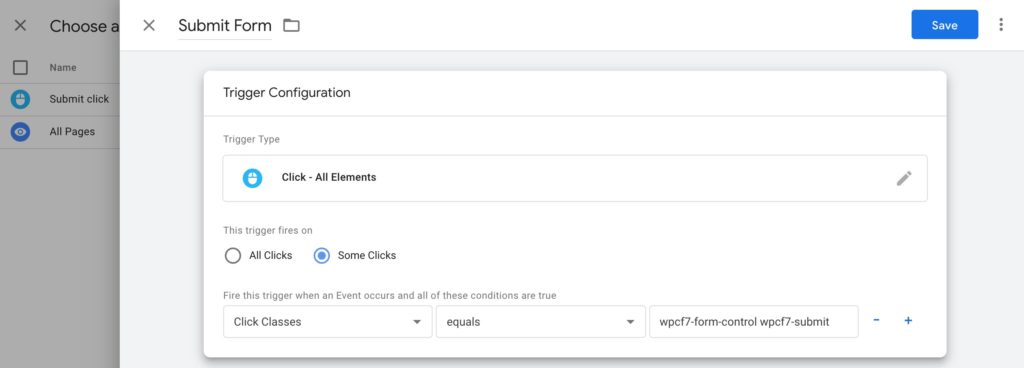
Since we are tracking a click chose Click – All Elements.
Since we are only looking to track the click of a specific button, choose Some Clicks.
Now, you’ll need to choose a variable that you can use to uniquely identify the click. This is the trickiest part. Right click the button you want to track and click Inspect. In my example, my button has a class that identifies it. In some cases, you will need to use another variable. Choose Equals and copy in the class name exactly or choose Contains and copy in just a portion of it.
Next, click Save and name your trigger.
Name your Tag and click Save.
Finally, you’ll need to save and publish your container.
Click Submit, type in a few words that will describe what you created (or updated) and click Publish.

Test Your Tag
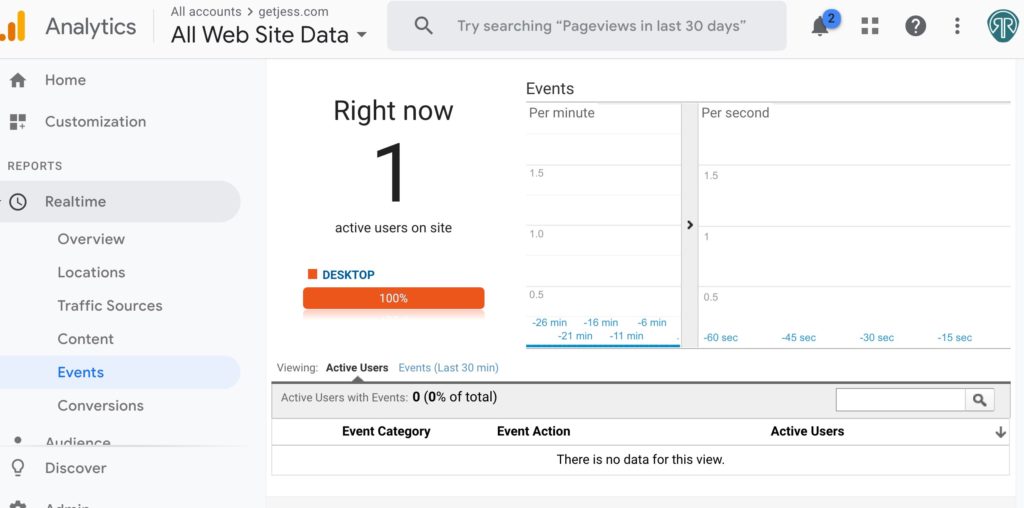
Now it’s time to test out what you did. Open Google Analytics. Open your website in another browser tab or window. Navigate to the contact form, fill it out, and submit it. Quickly go back to Google Analytics and click Realtime. Verify that Event Category and Event Action match what you set up in your new tag. If you see them, you are all ready to set up your event tracking goals. If you don’t see an event tracked at all, carefully retrace the steps above. In particular, make sure you have used the right logic in your variable and be sure to re-publish the container if you make any changes.
Google Tag Manager can be used to track a lot more actions than just user clicks, but we covered a lot already, so that’s for another day.
If everything looks OK, you are ready to read our next post and learn how to set up the Event Goals in Google Analytics.
Confused by Google Tag Manager event tracking? Just post a comment below and we will try to help out. Ready to move beyond Google Analytics? Check out Jess marketing analytics software.
Don’t miss out on our next tutorial! Please subscribe to our marketing newsletter.


0 Comments