What is a Destination Goal?
A Destination Goal tracks when a user visits a particular page. For example, you can track that a user reached a thank you page after the successful submission of a contact form or online order form. Destination Goals are easy to set up, and this tutorial will help you select the right page visits to track and help ensure every step is done correctly.
Purists might argue that Destination Goal setting is unnecessary because you can track when people click the submit buttons on forms using Event Goals. However, for those of you just getting started using Google Analytics or who aren’t particularly tech savvy, we recommend you consider using destination goals. We will show you how to set up Event Goals in our next blog post, so you can compare both Event and Destination Goals before you start.
Identifying the Destination URL
For those of you who decide to proceed with Destination Goals, you’ll need to identify the destination URL you want to track. Note that some forms display a message rather than navigating to a thank you page after a successful submission, which will add a step to the process. So, if you aren’t sure how your contact forms are handled, submit a test contact form, see if it redirects, and if it does, copy the destination URL.
So what happens if your form redirects back to itself and shows a message that you successfully submitted your contact form? You’ll need to first create a thank you page and have your forms redirect to it upon completion or alternatively, you can use Event Goal tracking. It doesn’t matter which method you use, so do what’s easiest for you.
Step by Step Destination Goal Setup
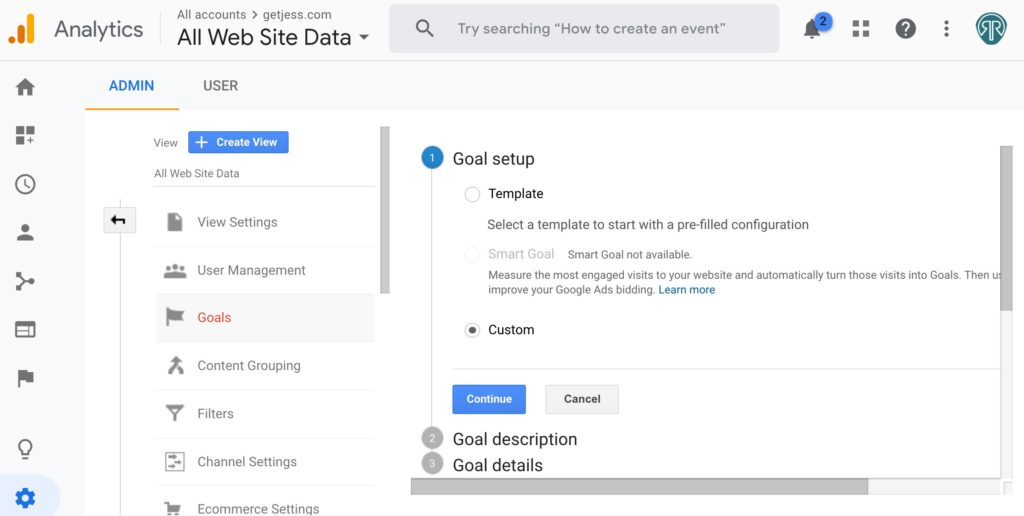
Once you have the URL, it gets easier. After clicking the Admin menu, click Goals and then follow the step by step instructions below:
1. Under 1 Goal Setup: select Custom and then Continue.

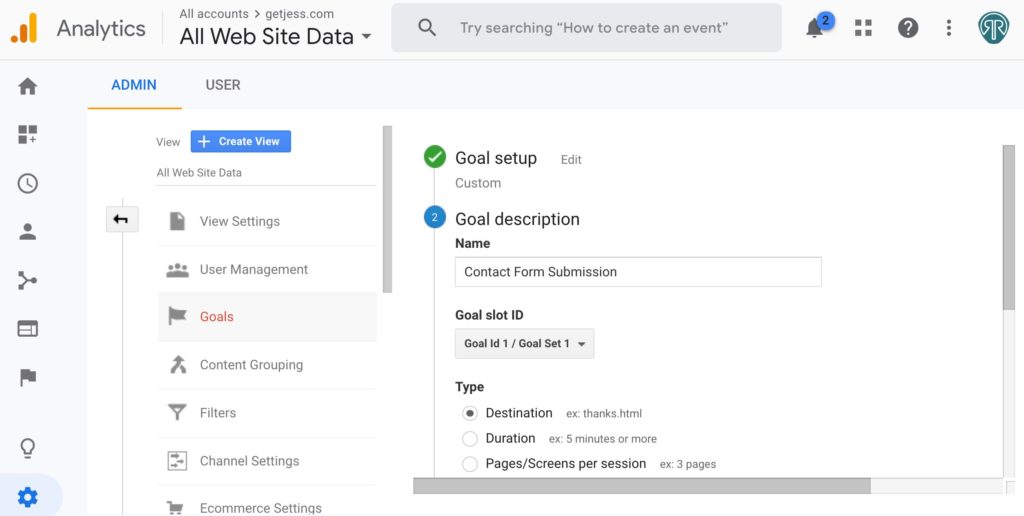
2. Under 2 Goal Description and under Name: specify a goal name (Use something you’ll recognize, for example “Contact Form Submission”).
3. Next, select Destination and then Continue.

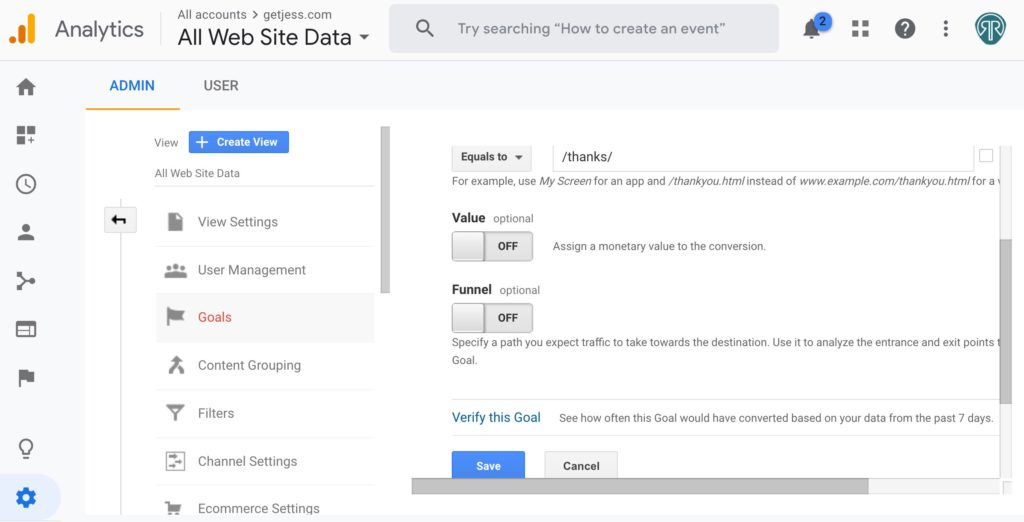
4. Enter the URL of the landing page into the Destination using the relative URL e.g. /thank-you.html, not the full URL sample.com/thank-you.html.
5. Click Save.

Test Your Destination Goal
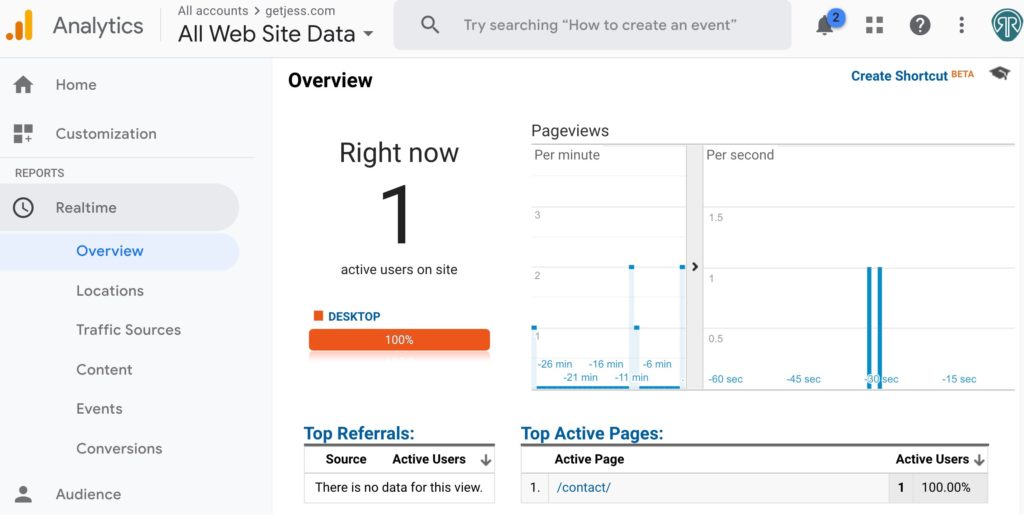
Now, test your Goal and make sure everything is set up correctly. From Google Analytics, click Real Time, followed by Conversions. Then complete a contact form and quickly navigate back to this screen. If everything was set up correctly, your goal should be recorded. If it’s not, go back into the admin and edit your goal. Confirm you followed the above six steps exactly. If you aren’t sure you identified the proper thank you page, select Real Time and then Overview and look under Top Active Pages to see what pages are listed as active for the landing page name.

If at this point you have any questions, please share your comments below and we’ll get you back on track!
Ready to learn more or need to implement goals like phone calls that require you to use event tracking? Read our post on how to use Google Tag Manager to track events.
Don’t miss out on our next tutorial! Please subscribe to our marketing newsletter.


0 Comments