Jess Documentation
Jess SetupJess Setup Overview
It’s easy to get up and running with Jess marketing analytics software.
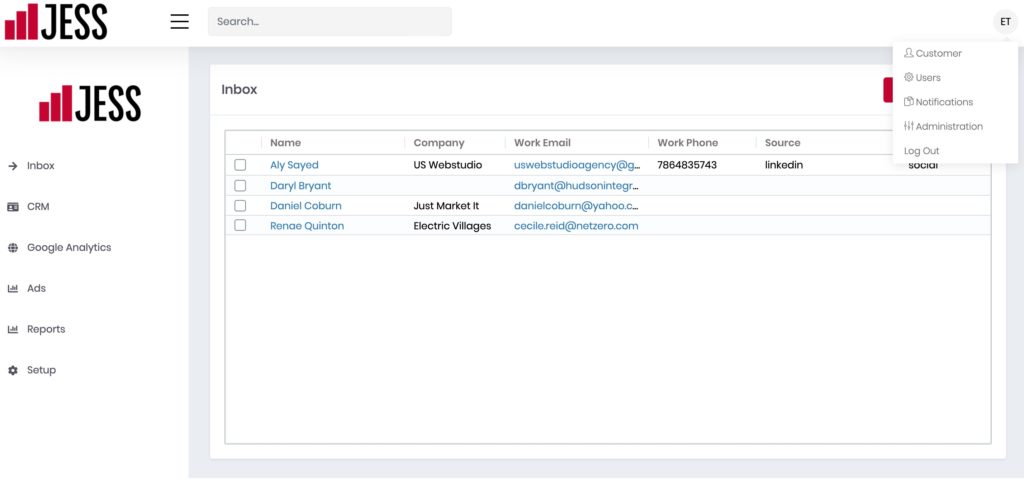
All setup and configuration functionality is controlled through the Customer and Notification menus in the Admin menu (upper right corner) and the Setup menu. All setup steps are optional. Complete the steps for the marketing platforms you use and to implement form and phone call tracking features.
If you get stuck or have questions, contact support for help.
Jess Essentials Setup
The following features are available for all Jess uses.
Google Analytics
Jess integrates with Google Analytics. Completing this configuration lets you see Google Analytics reports in the Jess dashboard and provides foundational data used in other Jess features. Completion of this step is recommended for all Jess customers.
To set up Google Analytics, you need to enter your Tracking ID into the Customer screen of the Jess Dashboard. Look up your Google Analytics Tracking ID in Google Analytics by clicking the Admin menu (gear in the lower left side of the screen), Tracking Info, and then Tracking Code. Copy the Tracking ID. It will look similar to this: UA-63575185-1.
In Jess, click on the admin menu in the upper right and click Customer. Paste the Tracking ID into the Google Analytics ID field and click Update Customer to save this information. Finally, click Connect, click on the email address of your Google Analytics login and click Accept.
Google Analytics will now appear in the left menu.
Google Search Console
Jess integrates with Google Search Console. Completing this configuration lets you see organic search query details in the Jess dashboard and provides foundational data used in other Jess features.
In Jess, click on the admin menu in the upper right and click Customer. Click the drop down under Search Console URL and select you site. Click Update Customer.
Google, Facebook, and Microsoft Ads
Connecting Jess to Google, Facebook, and Microsoft ad platforms lets you see basic information about these campaigns in the Jess dashboard and provides data used in other Jess features. You can also add cost of advertising of other ad sources manually. Completion of this step is recommended for all Jess customers using one or more of these advertising platforms.
From the Jess dashboard, click Ad Sources. Click the New Ad Campaign Button.
Click Link Account to link Facebook or Google Ads campaigns. You must be logged into these systems to connect to them and allow Jess access. Choose your account from the list that appears. Choose one or more campaigns to include. Click Save.
Enter the name of your campaign in Name (e.g. Facebook Ads, Google Ads, or Microsoft Ads)
Select the Data Source.
Select the account and campaigns you would like to import. You can import all or select campaigns one at a time.
Jess Form Setup
If you are using the Jess form tracking add on, complete the Jess form setup.
1. Quick Form Setup
Jess was designed to work with your own forms. If you are using a popular WordPress plug-in, SquareSpace or Weebly, you can use the following Quick Setup process. Use the Standard Setup if you want to manually map the fields of any form or if you are using a form not supported by our quick setup code.
Log into Jess, and click on Setup, Integration. Copy the form integration code, which looks like the following code snippet but with have your site’s integration key information, and paste it before </body> on every page of your website.
<script type=“text/javascript” src=“https://app.getjess.com/fi.js”></script><script type=“text/javascript”> new JessCRMForm({integration_key: ‘313d11e5-a553-493e-af63-2320acd4b0bb’}) </script>
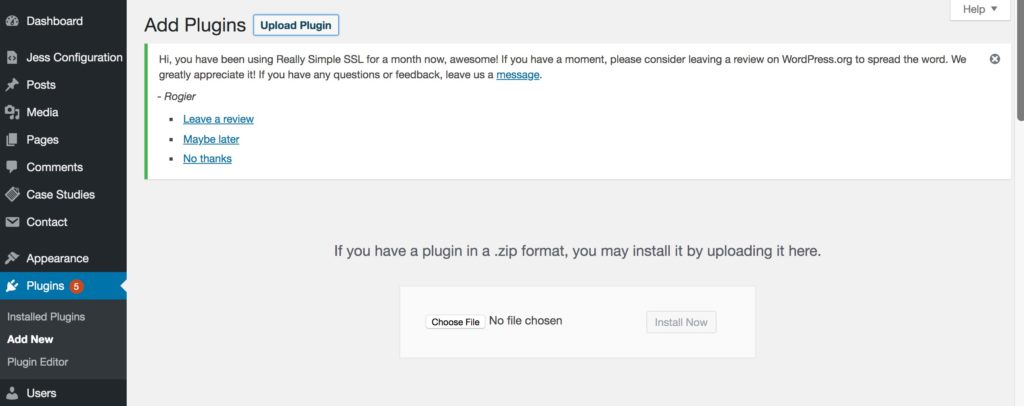
If you are using WordPress, you can download, install, and activate the Jess Configuration Plugin and your code will be installed properly. From WordPress click Plugins, Add New, Upload Plugin, Choose File, select Jess Configuration Plugin from your files, Open, Install Now, Activate Plugin.
Click Jess Configuration from the left menu and enter your integration key. You can find your key by clicking Setup, Integration from the Jess menu.
Submit a test contact form to make sure your data imports into Jess.
If you are using a different platform than the ones listed above or you would like to customize how your contact fields map to Jess, you will need to use the standard form setup, which is covered in Step 2 below.
2. Standard Form Setup
As mentioned in Step 1, Jess installation is simplified if you are using a popular website platform or WordPress and commonly used contact form plug-ins. If you were able to submit a contact form by installing the code in step 1, you can skip this section. If not, you will need to manually configure and add the form mapping code block to any page where you have a contact form.
First, make sure you completed installing the code snippet in step 1.
Next, navigate to Setup, Integration in the Jess Dashboard. You’ll find the code you need to use under Manual Configuration. Configure and add the manual configuration code for each form underneath the automatic integration code that you added in Step 1.
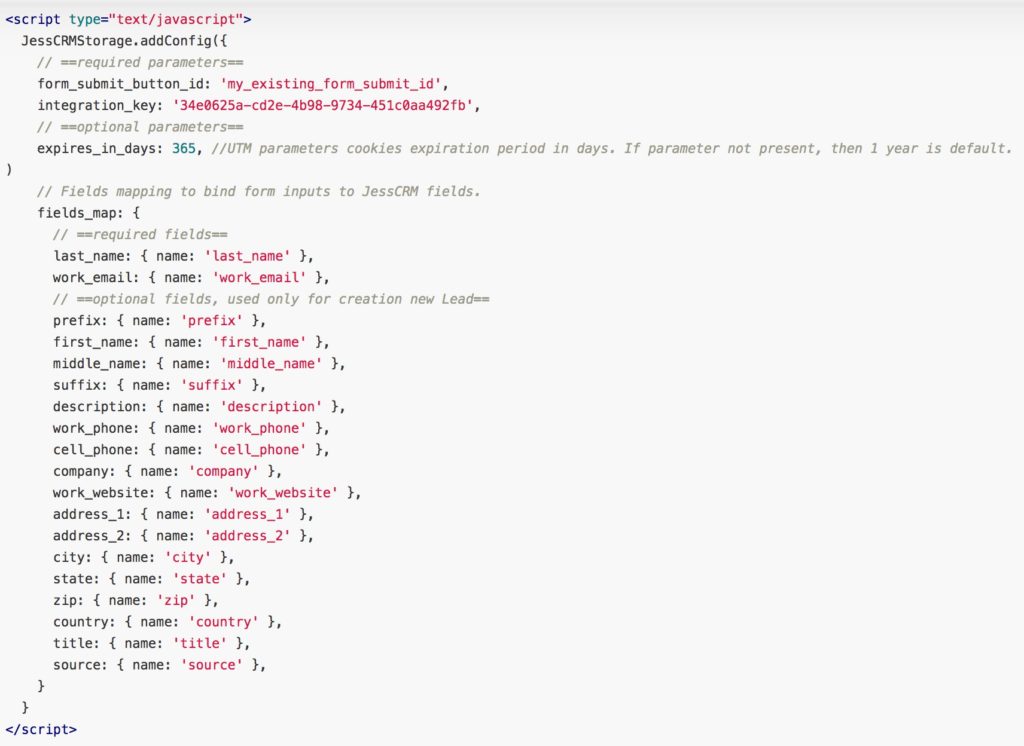
Configuration Parameters
You’ll have to substitute the following variables so they match those of your own form.
integration_key – replace this with your own integration key which you can find by clicking Integration from the Jess menu. If you copy the code from the Integration menu, your integration key will already be correct.
form_submit_button_id – replace my_existing_form_submit_id with the ID attribute of the form’s submit button. To find the ID, right click the button (or Ctrl+Click if you are using a Mac) and click Inspect. You’ll see a code block come up. Look for the code snippet that contains “id=”. What follows the = sign is your ID. For example, the form_submit_button_id should be set to form-submit if you see “id=form-submit”.
All field_map variables, e.g. last_name_field_id, work_email_field_id, etc. – replace variables with the ID or name attribute for each of your form’s fields. Please note the last name and work email fields are required. Right click the fields and follow the instructions in the section above to identify the ID of each field.
Important note: if you can’t find an ID for any element, you can use the “name” attribute instead. Names will be in this format: “name=email_address”. If you can’t find the ID or name attribute, you will need some help reprogramming your form or using jQuery to create the IDs. Contact us if you get stuck.
After you are done mapping all of your fields, delete all field mapping parameters that aren’t required. For example, if you aren’t capturing a middle name, delete the line middle_name: ‘middle_name_field_id’,
The code below is for illustrative purposes and includes all fields that are available to map using the name attribute. If you were using IDs, you would substitute id: where you see name:. Keep in mind, integration key in the same code below needs to be replaced with own key. You can copy your own code block with your integration_key already in place from the Jess Integration menu.
Troubleshooting Form Setup
The form configuration has to be configured and installed exactly in order to work. If your form isn’t working, here are some things to check before contacting us.
Did you install your code above the </body? tag? Click Tools, Developer Tools, View Source (or View, Developer, View Source in Chrome) and search for “Jess” to check.
Is a comma after every item in the field map except the last line? There need to be commas after every item in your field map except the final one.
Do you have extra spaces in your parameters? zip: ‘zip-code’, is correct. ‘ zip-code’, and ‘zip-code’ , are not.
Do you have any extra fields in your field map? Remove any extra fields.
Do you have the correct field IDs? If you aren’t sure, copy the ID rather than rekey it.
Did you map the IDs to name:? In this case, change name to id.
Jess Phone Tracking Setup
Jess lets you track who called you and how they found you. In order to use this feature, you need to set up a pool of phone numbers for use on your site and install tracking code on your site.
Install Phone Call Tracking Code
From Jess, click Setup, Phone Numbers. Enter the phone number that appears on your website and click next. Copy the code snippet and place it in the Head section of every page of your website. This is a sample of the code block you will paste into your site. Be sure to use the code snippet with your integration key.
<script type=“text/javascript” src=“https://app.getjess.com/phone_integration.js”></script>
<script type=“text/javascript”>
new JessCRMNumberReplacer({
integration_key: ‘8a005174-d3d9-45e7-ab85-247ee197a3e1’
})
</script>
Order Phone Numbers
You can order phone numbers by scrolling down to Order Numbers.
Enter your area code and the numbers you need. Click Search and then Order.
If there are no numbers in your area code, you can search for alternative by entering a zip code or you state abbreviation and city and click Search again.
Determine Phone Number Quantity
To ensure we set up the right number of phone numbers, we’ll need to know the highest number of users your website had in one hour the last month, which can be found in Google Analytics. Just go to Audience and then Overview from the Menu and then Hourly from above the graph and roll over the highest point in the line graph. For best results, you’ll want to make sure a phone number is available for each visitor. Take the highest number of hourly visits and divide by 4 to get the number of phone numbers you need.
We can also set up additional numbers to track calls activity that happens on other advertising platforms. For example, you can order a single number to track calls directly from Google Ads or for use in offline marketing such as billboards or brochures.
Additional Setup Options
Add UTM Data to Links
UTM parameters are used to provide information about your ad sources. Google Ads can be configured to add them automatically. You’ll need to generate URLs with UTM parameters manually for other ad source you’d like to track, for example, email newsletters or links from third party sites. If you are unfamiliar with UTM parameters, read our UTM parameter tutorial.
Google Ads
If you are using Google Ads, follow these steps to configure Google Ads to use URLs with UTM parameters.
- Click Campaigns
- Click Settings, Account settings
- Copy the following code snippet and paste it into the tracking template field: {lpurl}?utm_source=google&utm_medium=cpc&utm_campaign={_campaign}&utm_content={creative}&utm_term={keyword}
- Click Campaign Settings
- Click Columns, Modify Columns, Custom Parameter, Apply
- Set custom parameters to capture the names of campaign as follows.
- Click Edit
- In the first field (which appear next to _), enter the word “campaign” (without the quotation marks).
- In the second field, enter the name of campaign you’d like to use. While you can use any names you like, we recommend using a name that lets you easily identify the campaign. We suggest using lower case characters and _ instead of space if you have more than one word in your campaign name, for example, bikes or rental_bikes
Facebook is easy to set up. If you are using Facebook Ads, replace your destination links with:
https://myurl.com/?utm_source=facebook&utm_medium=cpc&utm_campaign={{campaign.name}}&utm_content={{ad.name}}
replacing https://myurl.com with your own domain name. If you prefer, you can use paid or any other identifying word as the medium parameter.
You can also add a utm_term parameter and use it to track another element of your campaign. To do so, just append the above link with &utm_term followed by that data you would like to report, e.g. audience targeting information. UTM parameters are very flexible. For complete information, visit Facebook to learn more about how to set URL parameters for your ads.
Set up URLs Manually for Other Advertising Services
You can use this URL builder to create property formatted URLs with UTM parameters.
https://ga-dev-tools.appspot.com/campaign-url-builder/
Source should be the name of the site, or in the case of an email, use newsletter or email.
For Medium, consider using cpc or paid for a paid source, or email for email marketing initiatives.
Campaign name, term, and content are optional, but can add more detail. For example, use Campaign Name to distinguish between multiple initiatives, for example, spring_2020 or summer_2020.
Keep track of the parameters you use, because you’ll want to use them consistently for best results. For example, stick to using either cpc or paid to indicate paid sources of traffic. Keep in mind that UTM parameters are case sensitive, i.e. CPC and cpc are considered different UTM parameters.
Fees
You can enter SEO, PPC, email marketing, social media marketing, or and other management fees or costs of third-party ads. The allows Jess to populate the cost per lead report.
From Admin, click on Setup, Fees and click + New Fee.
Enter the fee name in the Name field, for example SEO Management fee.
Enter the Source and Medium of traffic from this source. For example, to track all organic traffic, enter organic as the UTM Medium. For Google Ads, enter cpc as the UTM Medium and google as the UTM Source. If you are unsure what source and medium is being recorded from your advertising campaign, you can find this information in Google Analytics under Acquisition, All Traffic, Source/Medium. Keep in mind UTM data is case sensitive.
Next, enter the amount of the fee either as a percentage (5 = 5%) or monthly amount. Enter the date range this fee is being charged. Click Create Fee.
Tracking Calls as Google Analytics Events
When Jess is integrated with Google Analytics, Jess will send an Event to Google Analytics when a call is made with the following parameters:
Category: Phone Call
Action: Call
This lets you include phone call tracking in Google Analytics reports and integrations.
You’ll need this data to set up a Google Goal to track this event. To learn how, visit our Google Event Goal tutorial.