Jess Documentation
Wix Form SetupInstalling Form Conversion Tracking Code on Wix Websites
From the Wix Dashboard:
First, click the “Site Actions” dropdown. It is the blue outlined button shown below. Next select “Edit Site.”
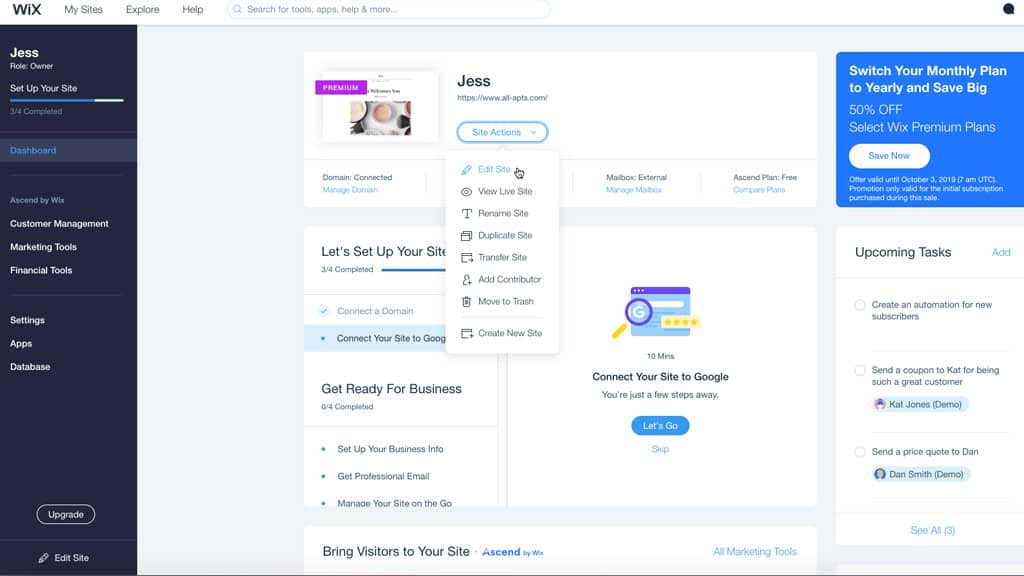
From the menu bar select the “Settings” dropdown, and then “Tracking and Analytics.”
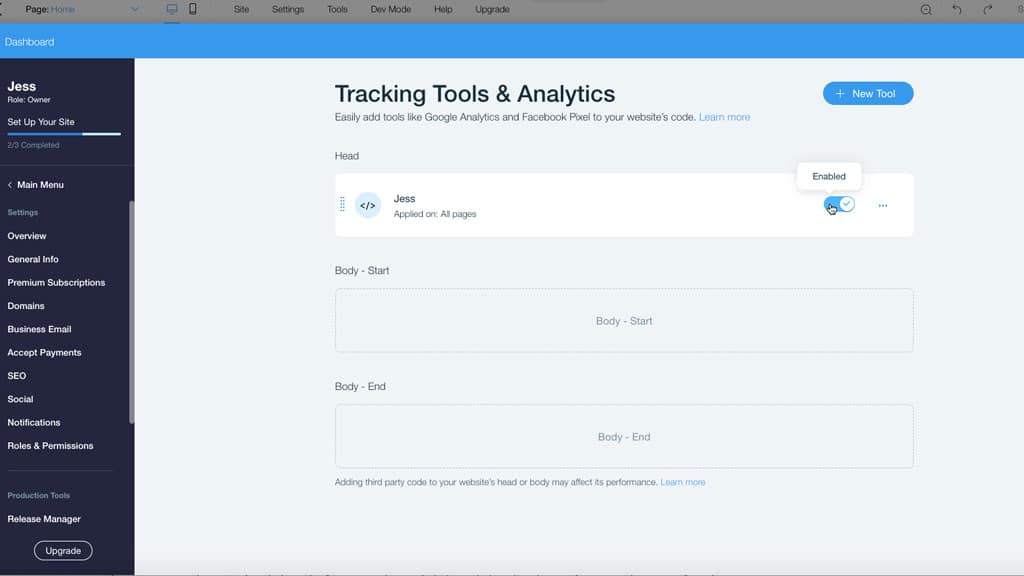
Select the blue “+New Tool” button and then “Custom” from the dropdown menu.

Paste your Jess form configuration code in. This can be found in the Jess platform under Setup, Installation Name it Jess. Keep the default settings (all pages: load once) except “Place Code In”. This should be set to “Place code in: Body-End.” Click Apply.
Make sure the toggle is set to “Enabled.” Closeout of the pop-up window. There is no need to publish the site, Wix saves automatically.
The last and most important step – test your form!